
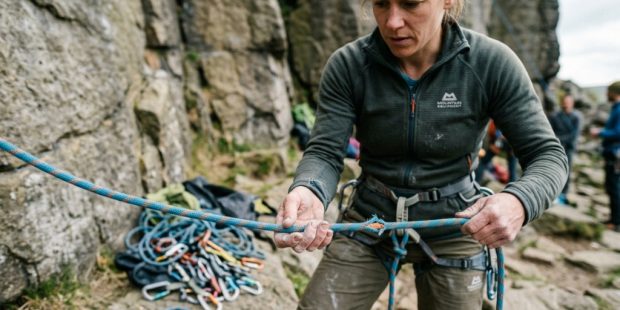
You are standing at the base of a climb, racking up, and you glance at your rope. When did you buy it? Did it take a big whipper last season? Has it been sitting in a hot car for a week? Every climber has felt that subtle knot of doubt. The truth is, a rope is your single most critical piece of life-support equipment, yet most climbers only inspect it when something goes wrong. Understanding a proper climbing rope safety test is not just a good idea; it is the difference between a fun day out and a catastrophic failure. This guide will walk you through exactly how to inspect, test, and retire your rope so you never have to wonder if it will hold.
What is a climbing rope safety test, and why does it matter?
Defining the Life-Saving Check
A climbing rope safety test is a systematic inspection protocol that evaluates the physical integrity of your dynamic rope. It is not a single action but a combination of visual checks, tactile analysis, and bend tests designed to identify fraying, core damage, chemical degradation, and wear thresholds. Unlike a simple glance, a proper test follows a repeatable process that catches hidden damage.
Why the Stakes Are Higher Than You Think
Your rope absorbs the energy of a fall by stretching. When the core is damaged, that ability diminishes. A rope that fails a safety test can snap on a relatively small fall. The climbing rope safety test is your primary defense against this scenario. Regular testing extends the life of your gear and, more importantly, protects your life. Ignoring it is like driving a car without checking the brakes.
When Should You Perform a Safety Test?
You should perform a detailed inspection at least once per season. However, you must test your rope immediately after any hard fall (fall factor > 1), if the rope ran over a sharp edge, after exposure to chemicals or battery acid, or if it has been heavily used in a gym setting. If you are unsure, test it. Rope is cheaper than an ER visit.
How to Perform a Visual Inspection for Rope Safety
Checking the Sheath for Abrasion and Fuzz
Start by running the entire length of the rope through your hands, inch by inch. Look for the “fuzz” that indicates sheath wear. A little fuzz is normal, but if you see individual strands breaking or a core strand poking through, that is a fail. Pay special attention to the first and last 15 feet of the rope, as these sections take the most abuse from tie-in knots and anchors.
Looking for Flat Spots and Soft Spots
A rope should be perfectly round. Run your thumb and forefinger along the length. If you feel a flat spot, it indicates a core bundle has shifted or broken internally. Soft spots feel mushy and mean the internal structure has been compromised. Both are automatic retirement conditions. Mark these spots with tape and recycle the rope immediately.
Identifying Chemical and UV Damage
If the sheath feels stiff, brittle, or has a strange discoloration (yellowing or bleaching), chemical or UV damage is likely. A rope that has been stored in a trunk or exposed to battery acid in a car is dangerous. If it smells like sulfur or has a sticky residue, do not climb on it. Chemical damage cannot be reversed, and the rope must be replaced.
Can You Trust a Visual Test Alone?
The Limits of the Naked Eye
No, you cannot. The most dangerous damage in a climbing rope is internal core damage that is invisible to the eye. A rope can look perfect on the outside while the core is 50% severed from a big fall or a sharp pinch. The visual test catches surface-level issues, but you must pair it with a tactile test to find hidden flaws.
The “Bend Test” for Core Integrity
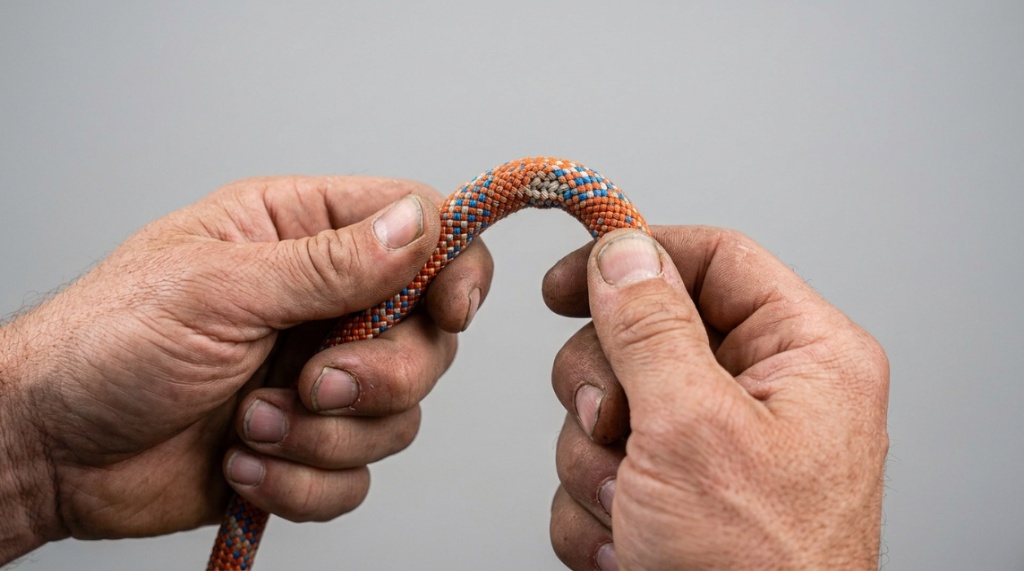
Take a section of the rope and bend it tightly into a U-shape. Look at the inside curve of the U. If the sheath wrinkles or separates from the core, you have a “sheath-core separation.” This is a critical failure point. Repeat this bend test every 3-4 feet along the entire rope. If you find a wrinkle, your rope has failed the climbing rope safety test and must be retired.
When to Go Beyond DIY Testing
For high-stakes climbing (big wall, alpine, or multi-pitch), consider sending your rope to a manufacturer for a professional load test. Some outfitters offer this service. If you cannot afford that, stick to the bend test and be conservative. When in doubt, throw it out is the golden rule of rope safety.
Which Parts of the Climbing Rope Wear Out Fastest?
The Tie-In Zone: The Most Vulnerable Spot
The middle six feet of the rope where you tie your figure-eight knot is the most stressed section. The constant friction of the knot, the sharp bends, and the weight of your body during falls wear this area out first. Inspect this zone after every single climbing session. If the sheath is frayed here, the core is likely damaged.
The Anchor End: The Second Weak Link
If you lead climb, the end of the rope that runs over the anchor carabiners (especially on top-rope) takes massive abrasion. This section also gets pinched by quickdraws during falls. If you primarily sport climb, check the last 10 feet near the knots. Uneven wear here is a sign you should flip your rope to even out the damage.
Comparison of Wear Zones
| Rope Section | Primary Damage Type | Inspection Frequency |
|---|---|---|
| Tie-in area (7-8 ft from end) | Sheath fraying, core damage from knot stress | Every session |
| Middle (30-60 ft) | Cutting or abrasion from edges | Monthly or after hard falls |
| Anchor end (last 15 ft) | Friction wear, pinch damage | Weekly during heavy use |
How to Test the Dynamic Stretch of Your Rope
Understanding the “Limp” Test
A rope that has lost its dynamic stretch is a static line and is extremely dangerous. To test this, take a 3-foot section and try to stretch it by hand. A healthy dynamic rope will have noticeable give. If the rope feels like a steel cable (very stiff), it has likely been over-stressed or is old. This is a classic sign that your climbing rope safety test has detected a failure.
Measuring the Diameter Loss
Over time, ropes flatten and lose diameter. Use a caliper to measure the diameter in the middle and at the ends. If the rope has thinned by more than 1-2mm from its original spec, its strength is significantly reduced. For example, a 10.0mm rope that now reads 9.0mm in the middle has lost roughly 20% of its cross-sectional area and should be retired.
Recording the Number of Hard Falls
Keep a log. Every manufacturer specifies a “number of UIAA falls” the rope can withstand. Most ropes are rated for 5-12 falls. If you have taken more than 5 hard falls (long whippers), replace the rope. You do not need to test the stretch; you need to track the history. A rope that has saved you three times already might not save you a fourth time.,
For a durable option suitable for light utility and craft projects rather than life-safety applications, check out our review of the Faxco 10ft Cotton Rope Breakdown.
Why Does Your Rope Feel Different After a Long Fall?
The Physics of Core Damage
During a fall, your rope absorbs energy by stretching. This creates heat and friction between the core strands. After a hard fall, the core can fuse together slightly, or individual strands can snap. This is why the rope feels “stiffer” or “softer” in different spots. The rope’s integrity has been permanently altered, and it will never return to its original condition.
The “Smell” Test for Heat Damage
After a big whipper, smell the rope where the fall happened. If it smells like burnt plastic or hot metal, the internal fibers have melted. This is an immediate fail. The rope has lost its dynamic properties. Do not climb on it, even for top-rope. The heat damage has created a brittle zone that will snap under tension.
How to Handle a Rope Post-Fall
Let the rope cool down completely. Do not coil it tightly. Lay it out flat. Perform a full climbing rope safety test including the bend test at the loaded area. If the sheath is discolored or there is a smell, retire it immediately. If it passes the initial checks, use it only for top-roping, not leading, until you are confident.
What Is the Best Way to Store a Rope for Long-Term Safety?
The “Bag and Dry” Rule
Never store a wet rope. Moisture promotes mildew and weakens the core fibers. Always dry your rope completely before putting it in a bag. Store it in a cool, dark place away from direct sunlight, extreme heat, and chemicals. A rope storage bag that allows airflow is ideal. Do not hang your rope in a garage where it can be exposed to solvents.
Avoiding the “Car Trunk” Mistake
The number one killer of climbing ropes is storing them in a hot car. Temperatures can exceed 140°F (60°C) in a sealed trunk. This heat slowly degrades the nylon, making it brittle. If your rope lives in your car, you are drastically shortening its lifespan. Keep it in your house and only bring it to the crag in your pack.
How to Coil a Rope Without Damaging It
Use the “butterfly coil” or “mountaineer’s coil” to avoid kinking the rope. Never use a “over-under” coil that creates sharp twists. Sharp twists create memory in the rope and can lead to sheath wear. A loosely coiled rope in a bag is the healthiest storage method. Avoid hooking the rope over a single nail or hook, as this creates a sharp bend point.
How Long Does a Climbing Rope Last Before It Needs Replacement?
The “Gym Rope” vs. “Outdoor Rope” Timeline
A gym rope used 3-4 times per week may only last 3-6 months. An outdoor rope used sparingly might last 2-3 years. The difference is purely usage. A rope that sits in a closet for 10 years, even if unused, should be retired due to material degradation. Nylon has a shelf life. Always check the manufacturer’s date code.
The Signs That Say “It’s Time”
- Consistent fuzziness along 30% of the rope length
- Core poking through the sheath
- Flat spots that do not bounce back
- One side is significantly more worn than the other
- You have taken more than 5 UIAA-rated falls
How to Recycle an Old Rope Ethically
Do not throw a retired rope in the trash. Many climbing gyms and outdoor stores have rope recycling programs. You can also use old ropes for dog leashes, girth hitches for trees, or static lines for hauling gear. Just clearly mark it as “Not for Climbing” with a red mark to prevent someone else from using it.
How Does a Rope Compare to a Static Line for Rappelling?
The Critical Difference in Safety Tests
A climbing rope is dynamic (stretchy) and designed to catch falls. A static line is for rappelling and hauling. You cannot test a static line with the same climbing rope safety test because static lines require different elongation standards. However, the inspection process for abrasion and core damage is identical. If you are part of the growing community using ropes for saddle hunting or rappelling, understanding these differences is vital.
Why Your Climbing Rope is Not a Rappel Rope (For Long Drops)
Using a dynamic rope for long rappels can be uncomfortable because it bounces. For short rappels (sport climbing), it is fine. For long canyon or mountaineering descents, a static line is safer. If you are looking for a specific option for saddle hunting or rappelling, you might want to read a detailed climbing rope safety test for those specific applications, as the wear patterns differ significantly from rock climbing.
Adapting the Test for Static Lines
When testing a static line, focus heavily on the “sheath slippage” test. Static lines can have the sheath slide off the core if damaged, which is a catastrophic failure. Bend the rope aggressively and look for the core sliding out of the sheath. This is less common in dynamic ropes but is a primary failure mode in static ropes.
Frequently Asked Questions
Can I wash my climbing rope to make it safer?
Yes, but only with cold water and a rope-specific cleaner or mild soap. Never use bleach, fabric softener, or hot water. Washing removes grit that acts like sandpaper on the sheath and core. A clean rope is easier to inspect, making your safety test more effective.
Is it safe to use a rope that has been wet and frozen?
No. When a rope freezes, water inside the core expands and damages the fibers. Even after thawing, the internal structure is compromised. If your rope has been frozen solid, consider it damaged. Perform a thorough safety test and be very conservative. Most experts recommend immediate retirement.
How often should I flip my climbing rope?
Flipping your rope once a month (or every 10-15 uses) evens out wear. Mark the middle of your rope with a permanent marker. When the ends look fuzzy, flip it. This can double the life of your rope. However, flipping does not replace a safety test; it just delays where damage occurs.
Can I use a damaged rope for top-rope only?
Technically, yes, but it is not recommended. A top-rope fall puts less dynamic load on the rope than a lead fall. However, if the core is damaged, any fall can snap it. If your safety test shows significant damage, retire the rope entirely. Top-roping is still falling, and the rope must absorb that force.
Does a rope lose safety if it gets dirty?
Yes. Dirt and grit act as abrasives. When the rope runs through a belay device, the grit grinds away the sheath. A dirty rope will wear out 2-3 times faster than a clean one. Dirt also hides damage. A clean rope is essential for an accurate climbing rope safety test. Wash it regularly.
What is the most common mistake climbers make when testing ropes?
Skipping the tactile inspection. Most climbers look at the rope but do not feel for flat spots, soft spots, or sheath slippage. Visual inspections miss internal damage. Always combine sight with touch. Run the rope through your hands slowly and deliberately. That is the only way to catch the silent killers.
How do I measure the fall factor to know if I damaged my rope?
Fall factor is the length of the fall divided by the amount of rope out. A fall factor of 1 or higher is hard on the rope (e.g., falling 10 feet with 10 feet of rope out). Factor 2 falls (falling twice the length of rope out) can instantly damage a rope. If you take a factor 1+ fall, your rope needs a thorough immediate test.
