

Your garage is a cluttered mess. The living room floor has become a tripping hazard. And every time you reach for your favorite shortboard, you accidentally knock over two other boards. You need a better storage solution, but the thought of drilling into your walls and measuring studs feels daunting. You want to know exactly how to install surfboard wall rack systems without damaging your equipment or your home. This guide walks you through every step, from choosing the right rack to securing it safely, so you can reclaim your space and protect your prized boards.
What Tools Do You Need to Install a Surfboard Wall Rack?
Essential Hardware and Fasteners
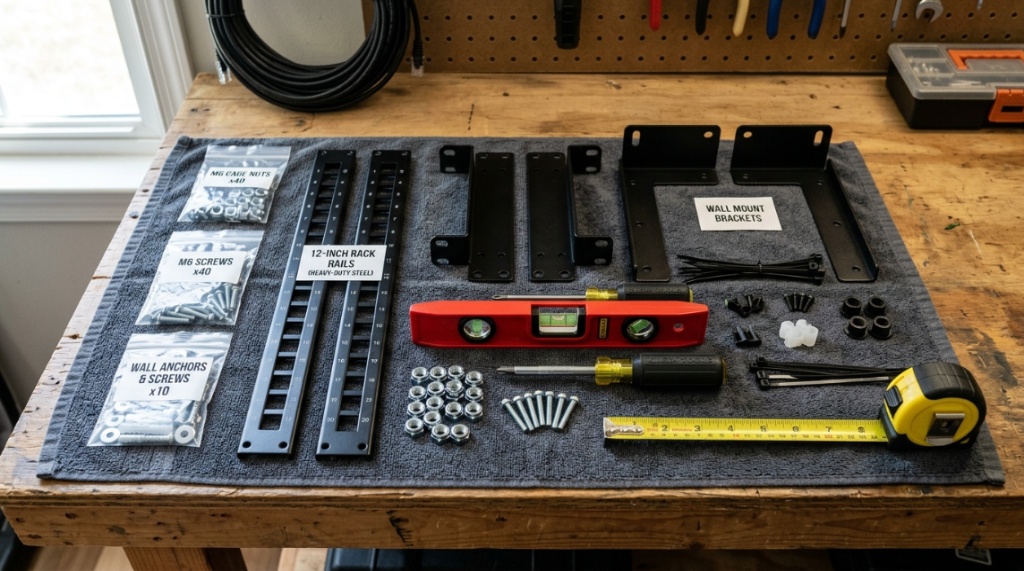
Before you begin, gather a power drill with a screwdriver bit, a stud finder, a level, a tape measure, and a pencil. For most wall racks, you will also need heavy-duty lag bolts or toggle bolts. Drywall anchors alone will not support the weight of multiple surfboards. Opt for bolts rated for at least 50 pounds per rack arm. If your rack kit includes screws, verify that they are long enough to penetrate at least 1.5 inches into a wooden stud.
Safety Gear and Workspace Prep
Wear safety glasses when drilling into wood or concrete. Clear the area of any furniture or boards to give yourself room to move. Lay down a drop cloth to catch drywall dust. Having a helper is useful for holding the rack in place while you measure and mark your drill points. Working alone is possible, but it requires extra patience and a steady hand.
How Do You Choose the Right Location for Your Surfboard Rack?
Wall Type Considerations: Drywall, Concrete, or Studs
The best location is a wall with exposed wooden studs. Use a stud finder to locate studs, then mark them with a pencil. If you cannot align your rack with studs, you must use heavy-duty toggle bolts rated for hollow walls. For concrete or brick walls, use a masonry drill bit and tapcon screws. Do not rely on plastic expansion anchors—they will fail under the dynamic load of a board being lifted on and off the rack.
Height and Accessibility for Daily Use
Mount your rack so the bottom board sits at least waist-high. This prevents you from bending over too far and reduces the risk of hitting the board against the floor. For a three-board rack, place the bottom arm around 48 inches from the floor. Leave at least 6 inches of clearance above the top arm so you can lift the board straight off without scraping the ceiling.
Which Type of Surfboard Wall Rack Is Best for Your Space?
Horizontal vs. Vertical Racks: Pros and Cons
| Feature | Horizontal Racks | Vertical Racks |
|---|---|---|
| Space needed | Wide wall space | Narrow wall space |
| Board capacity | 2–4 boards | 1–3 boards |
| Ease of access | Very easy to grab | Requires lifting up |
| Best for | Garages, living rooms | Closets, tight halls |
Horizontal racks are the most popular choice because they allow you to grab any board without moving others. Vertical racks save floor space but require you to lift the board straight up, which can be awkward for heavier longboards.
Foam-Cushioned vs. Bare Metal Arms
Foam-cushioned arms protect the rails of your board from dings and scratches. Bare metal arms require you to add your own pipe insulation or neoprene padding. If you value a quick, no-modification install, foam-cushioned racks are safer for your equipment. For DIY builders, wrapping metal arms in pool noodles is an inexpensive alternative that works just as well.
How to Install Surfboard Wall Rack in 6 Easy Steps
Step 1: Locate and Mark the Wall Studs
Run your stud finder across the wall until it beeps. Mark the center of each stud with a pencil. Measure the distance between studs to confirm they are 16 or 24 inches apart. If your rack has a wider mounting plate, you may need to span two studs for stability. If you only have one stud available, use a single-stud mount or a wall anchor system on the second side.
Step 2: Measure and Level the Mounting Bracket
Hold the rack bracket against the wall at your desired height. Use a level to ensure it is perfectly horizontal. Mark the screw holes through the bracket onto the wall. Double-check your marks before drilling. A crooked rack will cause boards to sit unevenly and may lead to them sliding off over time.
Step 3: Pre-Drill Pilot Holes into the Studs
Using a drill bit slightly smaller than your lag bolts, drill pilot holes into the center of each stud. Pilot holes prevent the wood from splitting and make it easier to drive the bolts in straight. Drill to a depth equal to the length of your bolt plus half an inch. For concrete walls, use a hammer drill and a masonry bit.
Step 4: Secure the Bracket with Bolts
Line up the bracket over the pilot holes. Insert the lag bolts and tighten them with a ratchet or drill until snug. Do not overtighten, as this can strip the threads or crack the bracket. If you are using toggle bolts, squeeze the wings flat, push them through the drywall, and tighten until the bracket is flush against the wall.
Step 5: Attach the Rack Arms and Padding
Slide the rack arms into the bracket according to your kit’s instructions. Most racks use a locking pin or a screw to secure each arm. If your rack has separate foam padding, slide it over the arms now. Ensure the padding covers the full length of the arm to protect the entire rail of your board.
Step 6: Test the Rack with One Board First
Gently place a lighter board on the rack. Give it a slight shake to check for wobbles. If the rack moves, tighten the bolts further. Once you are confident in the stability, add the rest of your boards. Check the rack monthly for loose bolts, especially after temperature changes that can cause wood to expand or contract.
How Do You Secure a Surfboard Wall Rack in Drywall Without Studs?
Using Toggle Bolts for Hollow Walls
Toggle bolts are the only safe option for attaching heavy racks to drywall without a stud. Drill a hole large enough to fit the folded toggle wings. Push the toggle through, then tighten the screw until the wings clamp against the backside of the drywall. Use at least two toggle bolts per bracket. Each toggle bolt rated for 50 pounds can safely support two surfboards when used in pairs.
When to Use a French Cleat System
A French cleat distributes weight across a wider area of drywall. This system uses two interlocking wooden strips—one mounted to the wall, one to the rack. The angle of the cleat holds the rack in place without relying entirely on individual screws. French cleats are excellent for heavy longboard collections because they spread the load across multiple anchor points.
What Mistakes Do People Make When They Install Surfboard Wall Rack Systems?
Ignoring Weight Ratings and Load Limits
Every rack has a maximum weight capacity. Do not assume a rack rated for three boards can hold three heavy gun boards. Check the weight limit per arm. A single arm designed for 30 pounds will fail under a 45-pound longboard. Always add a 20% safety margin to your total load calculation.
Mounting Too Close to Doors or Windows
Racks installed near door frames restrict swing space. You may hit your board against the door when removing it. Leave at least 12 inches of clearance on the side where you stand. For racks near windows, ensure the boards do not block natural light or interfere with blinds.
Overlooking Ceiling Clearance
If you have a low ceiling, test the height before installing. Hold a board vertically under the rack to ensure you can lift it straight off without hitting the ceiling. A common mistake is mounting the rack too high, forcing you to tilt the board at an awkward angle during removal. Aim for 6–8 inches of clearance above the tallest fin. Once your board is properly displayed, consider your other gear. If you have multiple boards or decks, check out the Top Reasons to Use a 5-Layer Skateboard Wall Rack for Organized Storage to keep your entire collection tidy.
How Do You Maintain Your Surfboard Wall Rack Over Time?
Monthly Inspection Checklist
Every month, check all bolts for tightness. Look for any cracking in the bracket or arms. Wipe down foam padding with a mild soap solution to remove salt and wax residue. If your rack uses metal arms, inspect for rust or corrosion, especially if the rack is in a garage or outdoor area. Replace any damaged padding immediately to avoid scratching your boards.
Seasonal Adjustments for Temperature Swings
Wood studs shrink in winter and swell in summer. This natural movement can loosen bolts over time. After the first major temperature shift of the season, retighten all hardware. In humid climates, consider adding a thin rubber washer between the bracket and the wall to prevent moisture from seeping into the drywall.
Can You Install a Surfboard Wall Rack Outdoors?
Weatherproof Materials and Coatings
If you plan to install a rack on an exterior wall, choose a rack made of powder-coated aluminum or stainless steel. Wood racks left outdoors will rot and warp. Use exterior-grade stainless steel lag bolts to prevent rust. Cover the rack with a tarp during extreme weather if the boards will remain mounted outside for extended periods.
Protecting Your Boards from Sun and Rain
Direct sunlight degrades the resin on surfboards over time. Rainwater can seep into pressure dings and cause delamination. Outdoor racks should be placed under a covered patio or eave. If you must install in an open area, invest in a breathable board bag for each board. Do not use plastic wraps, as they trap moisture and encourage mildew growth.
What Should You Look for When Buying a Surfboard Wall Rack Kit?
Material Quality and Finish
Look for racks made from heavy-gauge steel or reinforced nylon. Avoid thin plastic racks that feel flimsy in your hand. The finish should be powder-coated or anodized to resist scratching. Check the rubber pads or foam sleeves for thickness—at least 3/8 inch of cushioning is ideal for protecting delicate epoxy boards.
Adjustability and Board Compatibility
Choose a rack with adjustable arm spacing. This allows you to accommodate different board widths, from a 18-inch shortboard to a 24-inch longboard. Some racks include interchangeable foam pads for different rail shapes. If you own hybrid or fish boards with wider tails, ensure the arms can spread wide enough to cradle the board securely without pressure points.
For a curated selection of durable, budget-friendly options that work well in Florida’s humid climate, install surfboard wall rack solutions that combine affordability with corrosion resistance have been tested by local surfers and gear experts.
How Do You Organize Multiple Boards on a Single Wall Rack?
Nesting Boards by Size and Weight
Place the heaviest board on the bottom arm and the lightest on the top. This lowers the center of gravity and reduces stress on the wall anchors. Nest shorter boards between longer ones to create a visually tidy arrangement. If you have an odd-shaped board like a gun or a stand-up paddleboard, dedicate a separate single-arm rack for it.
Labeling and Rotation for Quiver Management
Use small colored stickers or tags to identify each board by wave size or riding style. Rotate boards every two weeks if they are stored for long periods. This prevents pressure dings from forming where the foam padding contacts the rail. Storing boards fin-side-up also keeps the fins from pressing into the padding and causing deformation.
Frequently Asked Questions
How much weight can a typical surfboard wall rack hold?
Most residential racks hold between 30 and 60 pounds per arm. Always check the manufacturer’s rating and factor in the combined weight of your boards plus any gear like leashes or fins stored on the same rack.
Can I install a surfboard wall rack in a rental apartment?
Yes, but you must use toggle bolts or a French cleat system that minimizes drywall damage. Patch the holes with spackle before moving out. Avoid adhesive-mount racks, as they can fail without warning and damage your boards.
Is it safe to store surfboards horizontally on a wall rack long-term?
Yes, horizontal storage is the safest method for long-term storage. It keeps the board flat and prevents warping. Ensure the rack supports the board along the full rail length, not just at the nose and tail.
What is the best height to mount a surfboard rack in a garage?
Mount the lowest arm at least 48 inches from the floor. This allows you to store boxes or a workbench underneath. For a ceiling-mounted rack in a low garage, aim for 12–18 inches of clearance from the ceiling.
Do I need to use a stud finder for every installation?
Yes, always use a stud finder, even if you are installing into drywall. Knowing where the studs are helps you choose the strongest fastening method. Installing into drywall without a stud requires careful anchor selection and weight calculations.
Can I build my own surfboard wall rack instead of buying one?
Yes, a DIY rack made from 2×4 lumber and foam pipe insulation is a cost-effective option. However, commercial racks are engineered to distribute weight evenly and include tested hardware. DIY racks require careful measuring and sturdy wood joinery to be safe.
How do I clean the foam padding on my surfboard rack?
Wipe foam padding with a cloth dampened in warm water and mild dish soap. Rinse with a clean damp cloth and air dry completely. Avoid bleach or harsh chemicals, as they can degrade the foam and transfer residue to your board rails.
Conclusion
Installing a surfboard wall rack is a straightforward project that transforms your cluttered space into an organized, board-friendly zone. By selecting the right rack type, locating wall studs, and using proper hardware, you can securely store multiple boards without damaging your walls or equipment. We covered everything from tool lists and step-by-step instructions to drywall anchors and long-term maintenance. Now comes the satisfying part—grab your drill, measure twice, and mount that rack. Your surfboards will thank you with fewer dings, and your living space will feel twice as open. Start your installation this weekend and finally give your quiver the home it deserves.
