
If your clothes are taking longer to dry than they used to, or your dryer feels unusually hot after a cycle, a clogged vent is likely the culprit. Lint buildup restricts airflow, forces your dryer to work harder, and creates a serious fire hazard. While professional cleaning services exist, many homeowners prefer a hands-on approach. The good news is that you don’t need specialized equipment to do a thorough job. Learning how to use universal vacuum attachments for dryer vents can save you money and keep your home safer. This guide walks you through the entire process, from choosing the right attachment to executing a complete clean.
Why Cleaning Your Dryer Vent Matters More Than You Think
The U.S. Fire Administration reports that roughly 2,900 home clothes dryer fires are reported each year, causing an estimated 5 deaths, 100 injuries, and $35 million in property loss. The leading cause? Failure to clean the dryer vent. Beyond the safety risk, a clogged vent reduces efficiency. When airflow is restricted, drying cycles take longer, and the heating element runs longer than necessary. This increases your energy bill and puts unnecessary strain on the machine, often leading to premature breakdowns. Regular cleaning—at least once a year, or more often if you have a large family—is one of the simplest maintenance tasks you can perform.
Understanding Universal Vacuum Attachments for Dryer Vents
Universal vacuum attachments are flexible kits designed to connect your standard shop vacuum or household canister vacuum to your dryer vent system. Unlike rigid pipes, these kits typically include flexible hoses, bendable rods, and specialized nozzles that can navigate the twists and turns of your vent line. They are called “universal” because they come with multiple adapter pieces designed to fit most standard vacuum hose diameters, typically 1.5 to 2.5 inches.
What’s Typically Included in a Kit
Most universal kits include a few core components. You will usually find a long, flexible hose that can be extended or shortened, a set of stiff but bendable rods that screw together to reach deep into the duct, and a variety of nozzle tips. Some kits also include a brush attachment that agitates lint off the duct walls while you vacuum. The versatility of these kits is their main selling point—they allow you to clean from either the dryer side or the exterior vent opening.
Shop Vacuum vs. Household Vacuum
Your choice of vacuum matters. A shop vacuum is generally the better option because it has higher suction power and is designed to handle debris and dust without clogging the filter. Household canister vacuums can work, but they may struggle with the volume of lint and could overheat if used for extended periods. If you are using a household vacuum, ensure it has a clean filter and empty the canister or bag before you begin.
Step-by-Step Guide: How to Clean Your Dryer Vent
Before you start, unplug your dryer. For gas dryers, also shut off the gas supply valve. This is a non-negotiable safety step. Once the dryer is disconnected, you can safely access the vent.
Step 1: Disconnect the Dryer from the Vent
Pull the dryer away from the wall to access the rear panel. You will see a metal or flexible foil duct clamped to the dryer’s exhaust outlet. Loosen the clamp and pull the duct away. You may also need to disconnect the duct from the wall vent opening. This gives you full access to both ends of the system.
Step 2: Vacuum the Dryer’s Exhaust Outlet
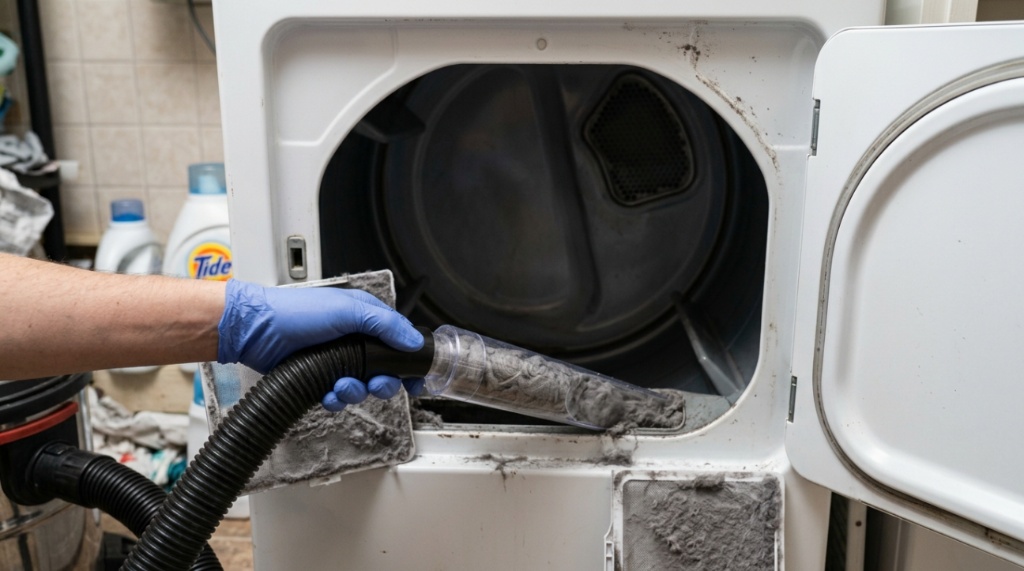
Before you tackle the long duct, use your vacuum with a simple crevice tool to remove loose lint from the dryer’s exhaust outlet itself. This is the area directly behind the dryer where the duct connects. You can often see lint buildup here, and removing it first prevents it from being pushed further into the line.
Step 3: Assemble Your Universal Attachment Kit
Attach the universal adapter to your vacuum hose. Then, connect the flexible rods to the adapter. The goal is to create a long, semi-rigid tool that can be pushed through the duct. Attach the brush nozzle to the end of the rods. The brush is essential because it loosens the lint that is stuck to the walls of the vent, allowing the vacuum suction to pull it through.
Step 4: Clean from the Inside Out
Insert the brush-tipped rods into the vent opening on the wall (where the dryer duct connects). Slowly push the rods as far as they will go, using a twisting motion to help the brush navigate bends. Once you reach the end, turn on the vacuum and slowly pull the rods back out. The suction will pull the loosened lint through the hose. Repeat this process two or three times, rotating the rods slightly each time to ensure you cover the entire circumference of the duct.
Step 5: Clean from the Outside In
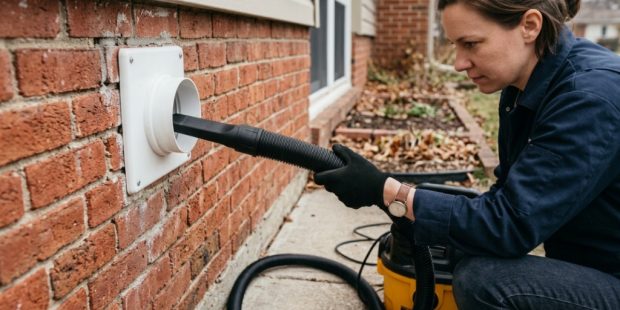
Go outside to the exhaust vent on your home’s exterior. Remove the vent cover (usually held on by a few screws). Use the same rod-and-brush setup to push the brush into the vent from the outside. This helps dislodge lint that may have been pushed toward the exterior and clears the final section of the duct. Have a helper run the vacuum on the inside while you push the brush, or simply push the brush in and pull it out to loosen debris, then vacuum from the inside again.
Step 6: Reassemble Everything
Once you have vacuumed from both ends and no more lint is coming out, reattach the duct to the dryer and the wall vent. Secure the clamps tightly. Push the dryer back into place, plug it in, and restore the gas supply if applicable. Run an empty cycle on the air-fluff setting for 10 minutes to ensure everything is working correctly and no lint is blowing back into the room.
Choosing the Right Attachment for Your Setup
Not all vent systems are the same. The length of your duct run and the number of bends will influence how easy the job is. For short, straight runs, a simple flexible hose might suffice. For longer runs with 90-degree bends, you will need a kit with stiff, interlocking rods that can be pushed without collapsing. When shopping for a kit, look for one that includes a rotating brush head, as this is significantly more effective at scrubbing lint off the walls than a plain nozzle. If you are unsure which kit to purchase, researching universal vacuum attachments for dryer vents can help you compare features and find a kit that matches your specific duct configuration.
Common Mistakes to Avoid During Cleaning
Many people make errors that reduce the effectiveness of their cleaning or even damage their dryer. Here are the most common pitfalls and how to avoid them.
Pushing Lint Deeper into the Duct
If you push the rods into the duct without turning on the vacuum, you are simply compressing the lint further down the line. Always turn the vacuum on before you begin pulling the brush back out. The suction is what removes the debris, not the brush itself.
Using a Flimsy Hose
A standard flexible dryer duct is not a good tool for cleaning. It is too soft and will simply bunch up inside the vent line. You need the stiff, interlocking rods from a universal kit to maintain control and push through blockages,For a stronger foundation against surface wear and tear, make sure your utility room is fully prepped by learning how to apply an Epoxy Garage Floor on Old Cracked Concrete.
Forgetting to Clean the Exterior Vent Cover
The flap on the exterior vent cover can become clogged with lint and even bird nests. While you are cleaning the duct, take the time to scrub the cover itself and ensure the flap opens and closes freely. A stuck flap can cause airflow to reverse, pushing lint back into your home.
When to Call a Professional Instead
While universal attachments are effective for most homes, there are situations where professional help is warranted. If your dryer vent run is exceptionally long (over 25 feet), has multiple sharp bends, or travels through the roof, a professional with specialized rotary brushes and high-powered vacuums may be necessary. Additionally, if you notice a significant lint buildup that you cannot dislodge, or if you smell burning odors even after cleaning, stop using the dryer and call a professional immediately. These are signs of a severe blockage that requires industrial-grade equipment.
Maintaining a Clean Vent Between Deep Cleans
Prevention is easier than cure. To extend the time between deep cleanings, always clean the lint filter in your dryer before every single load. This simple habit catches the majority of lint before it ever reaches the vent. Also, check the exterior vent cover monthly to ensure it is not blocked by leaves, snow, or debris. If you notice your dryer taking longer to dry clothes, do not ignore it—perform a quick check of the vent line before the problem worsens.
Frequently Asked Questions
How often should I clean my dryer vent?
You should clean your dryer vent at least once a year. If you have a large household, dry multiple loads daily, or have pets that shed heavily, consider cleaning it every six months. Signs that you need to clean it sooner include longer drying times, a hot dryer exterior, or a burning smell.
Can I use a regular household vacuum instead of a shop vacuum?
Yes, but with limitations. A household canister vacuum can work for short vents with minimal buildup, but it may clog quickly. A shop vacuum is strongly recommended because it is designed to handle large volumes of dry debris without losing suction.
Will these attachments work on all dryer vent types?
Universal attachments are designed to work with most standard 4-inch rigid metal ducts and flexible foil ducts. They may not be suitable for very narrow or non-standard ducting. Always check the diameter of your duct and the specifications of the kit before purchasing.
Is it safe to clean a gas dryer vent myself?
Yes, it is safe as long as you shut off the gas supply valve and unplug the dryer before starting. Do not attempt to clean the internal components of the dryer itself, only the exhaust duct. If you are uncomfortable working with gas appliances, hire a professional.
What is the best way to remove lint stuck to the duct walls?
The most effective method is to use a brush attachment on the end of your vacuum rods. The bristles physically scrub the lint loose, while the vacuum suction immediately removes it. Simply using suction alone often leaves a thin layer of lint behind.
Conclusion
Cleaning your dryer vent is a straightforward task that has a significant impact on your home’s safety and your energy bills. With a quality set of universal vacuum attachments, you can tackle this chore in under an hour without calling a professional. Remember to prioritize safety by disconnecting power and gas, work from both the interior and exterior of your home, and use a brush attachment to loosen stubborn lint. By incorporating this simple maintenance task into your annual routine, you will extend the life of your dryer, reduce fire risk, and enjoy faster drying times. Take the time to do it right, and your dryer will thank you for years to come.
