
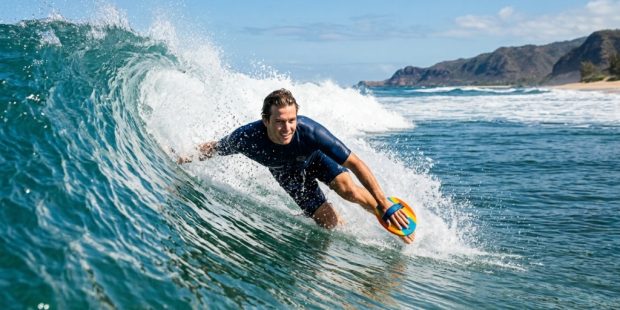
You’ve felt it before. You’re paddling hard, reading the wave, and at the moment of truth, the ocean just slips past your hands. Your body loses its line, you drop off the face, or you eat a lip that you know you had the speed to beat. While raw fitness and wave reading are the foundation of the sport, the most immediate upgrade to your game is hiding in your gear bag. By adding a small piece of high-density foam or plastic to your hand, you are not just adding speed; you are adding a new dimension to your wave riding. This guide breaks down exactly how to leverage that piece of equipment to elevate your takeoffs, increase your speed, and unlock maneuvers you previously thought required a surfboard.
We will cover everything from the biomechanics of why handplanes work, to specific paddling techniques, and how to use them for critical turns. Whether you are a competitive bodysurfer or a weekend warrior, understanding the depth of bodysurfing performance with handplanes will change how you look at every wave you paddle into.
Key Takeaways
- Handplanes increase your surface area, which lowers your planing threshold, allowing you to generate more speed on weaker waves and steeper faces.
- Proper hand placement on the plane is critical; holding it flat against the water during the glide phase and angling it during turns prevents drag and stabilizes your lead arm.
- Using a handplane forces you to lead more with your upper body and shoulder, fixing common “dropped arm” issues that cause speed loss during steep descents.
- Modifications to your angle of attack during paddling can reduce shoulder fatigue and double your effective paddle power before takeoff.
- You must adjust your kick strategy based on the handplane, using a narrower and faster kick to match the increased speed of your upper body.
Why a Handplane Changes Your Speed Dynamics
To understand how to boost performance, you have to understand the physics. When you bodysurf without a handplane, your hand sinks slightly as you push through the water. This creates drag and forces your body to sit deeper, increasing the friction along your torso. A handplane creates lift. It allows your leading limb to slide along the water’s surface rather than cutting through it. This lift reduces the contact surface area of your entire body just enough to allow you to accelerate down the line.
This is fundamentally about your planing threshold. Without the plane, you need a critical minimum wave speed to stay on top of the water. With a handplane, you can generate that required speed earlier and on weaker swell faces. You will notice this immediately as you transition from a prone position to the face of the wave. The board catches the water, your body rises to the surface, and your speed increases dramatically, allowing you to transition into the curl with much more time to set your line.
Paddle Power: The Overlooked Efficiency Gain
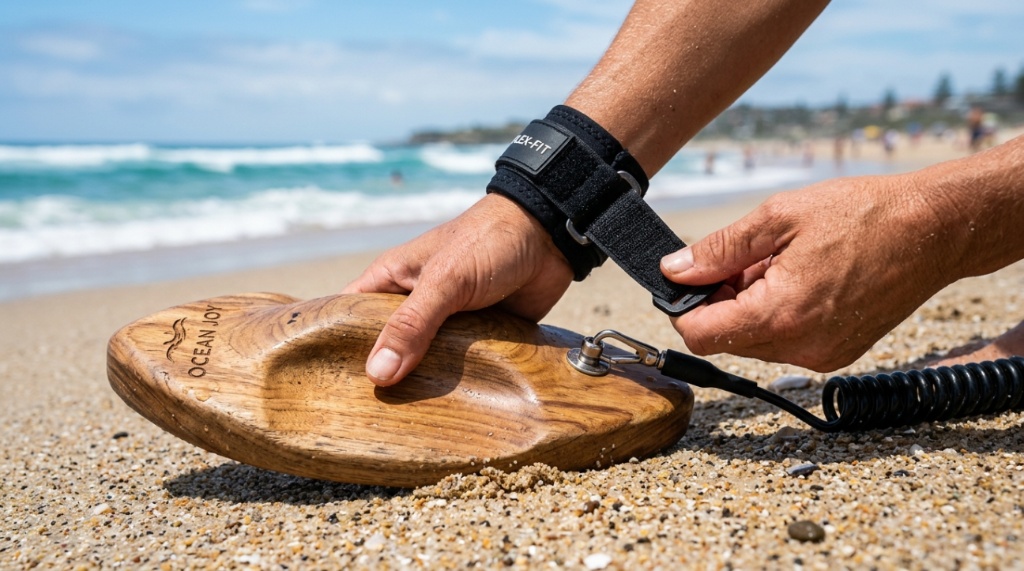
Most riders think of handplanes purely as a riding tool, but they are equally powerful during the paddling phase. The trick is that you cannot paddle the same way you do without the plane. If you use a standard cupped-hand stroke, the large surface area of the plastic or foam plane will catch the water and pull your shoulder down, causing rapid fatigue.
Adjusting Your Stroke Mechanics
Instead of pulling straight down, you must slice the handplane into the water at a shallow angle—think of it as knifing the edge in first, then flattening the palm. This technique reduces the strain on your rotator cuff and engages your latissimus dorsi more effectively. In essence, you are turning your arm into a paddle with a larger blade, and by adapting the entry angle, you get roughly 30% more propulsion per stroke without burning out your shoulders.
The “Sculling” Cadence
On smaller days, you should switch to a sculling motion. Keep the plane flat on the surface and flick your wrist back and forth like you are waving goodbye to the wave. This negates the arm fatigue of pulling and instead uses small micro-movements to gain forward momentum. It is a technique often used by lifeguards with rescue boards, and it is incredibly efficient for paddling over flat sections to get into a lumpy swell.
Mastering the “Glide Phase” for Maximum Speed
Once you are up and riding, the position of your arm is the single biggest factor in how fast you go. The biggest mistake is holding the handplane directly in front of your head with your arm fully extended and “locked out.” While this might help you break the surface, it puts your upper body in a low position, causing drag against your chest.
Instead, you want to move into the Glide Phase. As soon as you have broken through the bottom of the wave and you are heading down the line, place the handplane back against your thigh. You do not need to keep it extended in front of you. By bringing your hand to your hip, you are streamlining your body shape, turning yourself into a bullet rather than a wide plank. This lower position also drops your center of gravity, giving you more stability at high speeds.
Using the Handplane as a Directional Rudder
While your body positioning defines your speed, the handplane defines your direction. In surfboard terms, your head and shoulders are the fins, but your hand is the rail. To turn, you must tilt the handplane up or down to catch the water. This is where the specificity of the gear matters; a plane with a defined bottom curve will allow for more aggressive directional changes.
Executing a Bottom Turn
As you descend the face and reach the trough, do not simply lean into the turn with your whole body. Extend your arm toward the direction you want to go, and rotate your wrist so the inside edge of the handplane digs into the water.
This digging creates a pivot point that allows your lower body to swing around. The key here is to use resistance rather than just looking where you want to go. The water pressure on the plane will do the work for you; you just have to guide it. If you fail to angle the plane and leave it flat, the turn will feel heavy and slow, as the water will push into the belly of the plane rather than slicing through it, To capture stunning footage of your sessions, make sure to Find a 4K Waterproof Camera for Ocean Sports before heading back into the surf.
Critical Considerations for Foam vs. Plastic Models
Not all handplanes are created equal, and your performance goals will dictate which material you choose. The choice between high-density foam and injection-molded plastic is not about brand loyalty; it’s about hydrodynamic behavior.
| Material Type | Buoyancy | Turn Initiation | Best Use Case |
|---|---|---|---|
| High-Density Foam | High (Rides higher) | Slower (requires more tilt) | Weak waves, mushy faces, and maximum glide. |
| Injection-Plastic | Low (Sits deeper) | Faster (sharp edges) | Steep, hollow waves where immediate rail engagement is needed. |
If you are riding a fat, rolling wave, the foam plane gives you that extra float to stay in the pocket. If you are attacking a pitching barrel, the plastic plane allows you to jam your hand into the wave face and pivot off it instantly. Do not buy a plane just because it looks cool; buy it based on the wave size you intend to ride.
The Compound Kick: How Your Legs Change Forever
When you add a handplane, your upper body moves faster than it ever has before. This creates a mechanical mismatch if you keep your standard long, sweeping kick. Your legs will act as an anchor, slowing down the speed generated by your hand.
To maintain equilibrium, you must narrow your kick. Keep your legs close together and use short, rapid pulses from the knee down, rather than the hip. This is often called a “flutter kick.” The speed of the kick must match the speed of your glide. If you feel your hips sinking or wobbling, you are either kicking too wide or not fast enough to counterbalance the planing force of the hand.
This is perhaps the most exhausting part of the learning curve. It takes time for your cardiovascular system to adapt to the rapid, high-frequency leg movements required to keep up with the handplane’s speed. But once you sync the two, you will feel like a jet engine igniting on the wave face.
Waves and Conditions: When to Use the Handplane
There is a common misconception that handplanes are only for barrel riding. In reality, they are incredibly versatile, but they do have limitations. In waves over six feet, the handplane becomes less about speed and more about control. You will use it to slow yourself down in the barrel to avoid shooting out the back, and to push your body weight into the wave to maintain traction on the face during steep drops.
Conversely, in waves under two feet, where surfboards struggle to generate speed, the handplane is a lifesaver. The extra surface area allows you to catch micro-swells that would otherwise roll right under you. The distinct advantage is your ability to position yourself right on the curl while moving—allowing you to chase the wave down the line in a way that bodyboarders cannot, as they have too much drag.
Frequently Asked Questions
Can a handplane actually help me catch more waves?
Yes. Because the handplane increases your surface area and provides lift, you will plane earlier than you would with a bare hand. This allows you to catch waves before they break, and you will find yourself sliding into waves that are steeper and more critical than those you caught before.
Should I use a handplane on my lead hand or my trailing hand?
Use it on your lead hand—the hand that points in the direction you are traveling. This stabilizes your lead shoulder and prevents your arm from dragging on the drop. Using it on the trailing hand is only recommended for advanced riders looking to execute specific “reverse” spins, but it is not for general riding.
Is it harder on my shoulders to use a handplane?
Initially, yes. Holding the plane against water pressure creates torque on the shoulder joint. If you experience pain, you are likely holding your arm too stiff. The fix is to keep a slight bend in the elbow and allow the plane to “float” independently, rather than forcing it rigidly against the water.
How long does it take to get used to the added speed?
Most riders take roughly three to five sessions to adjust to the glide speed. The first session will feel uncontrollably fast, but your body will quickly recalibrate its balance points. The key adaptation is learning to shift your weight back slightly to prevent the nose of your body from pearling.
Conclusion
Boosting your bodysurfing performance with a handplane is not about buying a magic piece of foam; it is about adapting your mechanics to a new tool. The immediate benefits—increased speed and glide—are just the beginning. The real gain comes from the subtle adjustments to your paddle stroke, the refinement of your kick, and the understanding of how to use your hand as a rail to pivot on the face of the wave. Start with the paddling adjustments and the glide phase first. Keep your arm relaxed, let the plane do the lifting, and let your legs adapt to the speed. With focused practice, you will find yourself riding waves with a level of control and velocity that boards cannot offer, connecting with the wave in a way that only raw, hands-on water can provide.
