

It usually happens right when you’re already tired: you open a baby food recipe, see ten ingredients and three separate cooking methods, and quietly decide that jarred food is fine tonight. And it is fine. But homemade baby food doesn’t need to look like a recipe at all. In fact, most of it follows one simple loop—cook, soften, blend, store—with no measurements required. If you also want a clearer picture of the equipment that makes this easier, ProBabyGuide covers the best baby food makers in Illinois alongside what actually matters when choosing one. Below is a method-based approach you can adapt to almost any fruit, vegetable, or protein.
Quick Answer
To make homemade baby food without recipes, pick one fresh ingredient, cook it until soft, blend it with a little water or breast milk until it reaches a safe texture for your baby’s age, then serve or freeze it in small portions. The “recipe” is really just a method: soft texture, safe consistency, and one ingredient at a time. Once you learn the method, you can apply it to nearly any food without measuring a single thing.
Key Takeaways
- Most homemade baby food follows four steps—cook, soften, blend, store—so you don’t need exact measurements or printed recipes.
- Texture should match your baby’s stage: thin and smooth at first, thicker and lumpier as chewing skills develop.
- Single-ingredient purées make it easier to spot reactions to new foods, which is why they’re the standard starting point.
- Ice cube trays and small containers let you freeze single servings, so you cook once and feed for weeks.
- Some foods need extra care—honey is off-limits under 12 months, and certain textures are choking risks for young babies.
Start With the Method, Not the Recipe
Every simple baby food recipe you’ve seen is secretly the same formula. Once you notice the pattern, you stop needing recipes altogether.
- Choose one ingredient. A single fruit, vegetable, grain, or protein. Fresh, frozen, or canned (unsalted, in water) all work.
- Make it soft. Steam, boil, roast, or microwave until a fork slides through it easily. Softness is what makes blending possible and safe.
- Blend to the right texture. Add water, breast milk, or formula a spoonful at a time until it’s smooth enough for your baby’s stage.
- Cool, serve, and store. Serve what you need, refrigerate the rest for a few days, or freeze small portions for later.
That’s it. The reason this works is that babies don’t need variety in a recipe—they need variety across their diet over time. One soft, well-blended ingredient at a time covers it.
Match Texture to Your Baby’s Stage
Texture is the one variable that actually changes as your baby grows, and it’s worth getting right because it affects both safety and skill development.
Starting Stage (about 6 months)
Aim for a thin, smooth purée that drips slowly off a spoon—roughly the consistency of plain yogurt. Most foods need added liquid to reach this point.
Intermediate Stage (about 7–9 months)
Move toward a thicker mash. You can blend less, use less liquid, or mash with a fork. Small soft lumps help babies learn to move food around their mouths.
Transition Stage (about 9–12 months)
Offer soft, bite-sized pieces your baby can pick up. Cooked carrot sticks, soft cooked pasta, and ripe banana pieces work well. This is where finger foods start replacing spoon-fed purées.
Don’t rush any stage. Some babies move through textures faster than others, and there’s no prize for speed. What matters is that your baby is getting practice with a range of textures before the first birthday.
Where Recipes Usually Go Wrong
Most homemade baby food problems come from a few predictable mistakes rather than from a lack of recipes.
- Skipping the salt and sugar question entirely. Babies don’t need added salt or sugar, and their kidneys aren’t ready to handle much sodium. Season your own portion after setting theirs aside.
- Using honey before 12 months. Honey can contain spores that cause infant botulism, which is why it’s excluded from all baby food under one year—even cooked into something.
- Over-blending forever. Staying on smooth purées too long can make the transition to lumps harder. Loosen up the texture as your baby’s skills grow.
- Leaving skins, seeds, or pits in. Some are choking hazards, and some are genuinely unsafe for babies. Peel and de-seed where it matters.
- Cooking with a lot of oil or butter for flavor. A little healthy fat is fine and even useful, but strong seasoning is for your plate, not theirs.
- Storing in one big container. You’ll end up thawing more than you need and refreezing, which affects quality.
Foods That Are Easy—and Foods That Need Care
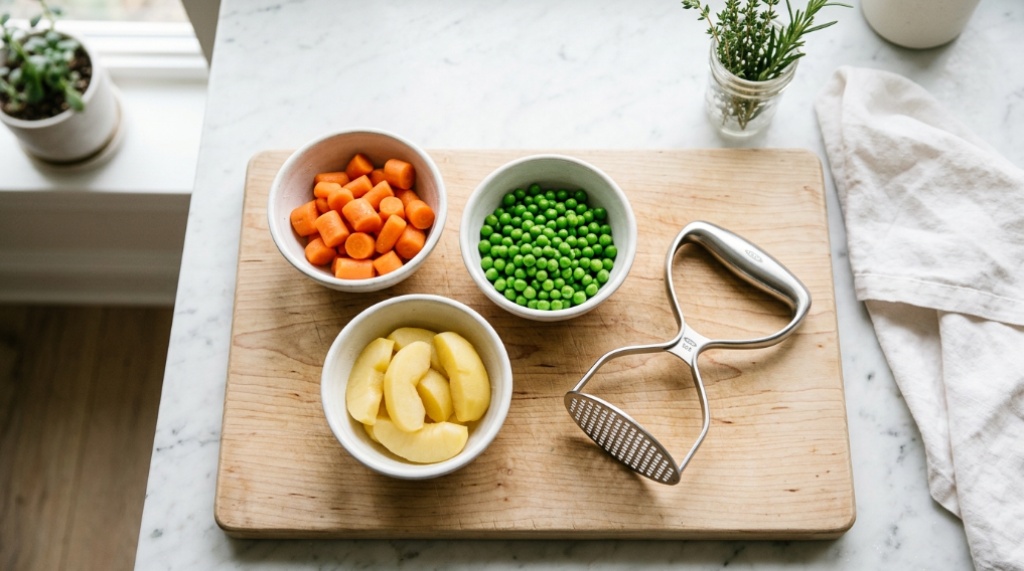
Some ingredients are nearly foolproof, while others need a little extra attention. Knowing the difference saves you time and reduces risk.
| Food | Simple Approach | Watch Out For |
|---|---|---|
| Sweet potato | Roast or steam, mash, thin with water | Very little—one of the easiest first foods |
| Carrot | Steam until soft, blend | Raw or hard chunks are a choking risk |
| Apple or pear | Peel, cook, blend | Peel can be tough; cook before serving |
| Banana or avocado | Mash raw with a fork | Browns quickly—serve fresh |
| Chicken or turkey | Poach, blend with cooking liquid | Needs enough liquid or it turns pasty; cook fully |
| Eggs | Hard-boil, mash with liquid | A common allergen—introduce on its own |
| Beans and lentils | Cook until very soft, mash or blend | Rinse canned versions to cut sodium |
A practical habit: introduce one new food at a time and wait a few days before the next one. If a reaction shows up, you’ll know what caused it. It’s not about being overly cautious—it’s about having a clear answer when something does go wrong.
Storing Homemade Baby Food Without a System
You don’t need a dedicated storage setup. You need small portions and a way to freeze them.
- Refrigerator: Most cooked baby food keeps for a few days in a sealed container. Label it with the date.
- Freezer: Ice cube trays work as portion molds—one cube is roughly one small serving. Once frozen, pop the cubes into a freezer bag and label it.
- Thawing: Move portions to the fridge overnight, or warm gently in a bowl of warm water. Avoid leaving food at room temperature for long stretches.
- Reheating: Stir and test the temperature before serving. If you’ve heated a portion, don’t save what’s left—saliva and warmth don’t mix well with storage.
Freezing single servings is the single biggest time-saver in this whole process. Cook once, freeze a batch, and you’ve removed the “what do I make tonight” decision for weeks, To ensure your family maintains a balanced lifestyle while exploring infant nutrition, you might also find it helpful to read about Understanding How Fast Food Affects Your Daily Habits.
When a Baby Food Maker Actually Helps
A pot, a steamer basket, and a blender will do everything described above. A dedicated baby food maker mainly saves you steps: many steam and blend in the same container, so you’re not moving hot food between appliances or washing extra parts.
That convenience comes with trade-offs. These devices take up counter space, cost more than basic tools, and often have a smaller capacity than a standard blender. They tend to make the most sense if you’re preparing food daily, want fewer dishes, or find the back-and-forth between pot and blender genuinely disruptive. If you already own a steamer and a blender, you may not need one at all—and there’s no rule that says you have to upgrade.
Frequently Asked Questions
Do I really not need any recipes at all?
Not for most foods. If you can cook an ingredient until soft and blend it to the right texture, you have everything you need. Recipes become useful mainly when you want to combine flavors or batch-cook larger quantities.
How do I know if the texture is safe for my baby?
Match it to your baby’s stage. Early on, anything that could form a lump large enough to choke on should be smooth. As your baby gains chewing experience, you can move toward soft pieces. When in doubt, thinner is safer for a younger baby.
Can I freeze everything?
Most cooked purées freeze well, including vegetables, fruits, meats, and legumes. Raw mashed banana and avocado don’t freeze well and are better served fresh. High-water-content foods may separate slightly when thawed—just stir them back together.
Is homemade always better than store-bought?
Not automatically. Store-bought baby food is convenient, tightly regulated for safety, and perfectly fine. Homemade gives you control over ingredients and texture, and it’s usually cheaper per serving. Many families use both, and that’s a reasonable approach.
How long can I keep homemade baby food in the fridge?
Cooked baby food typically keeps for a few days in a sealed container in the refrigerator. If you’re unsure how long something has been sitting, it’s better to discard it than to risk it.
What if my baby rejects a food?
That’s normal and often temporary. Babies may need several exposures before accepting a new flavor. Keep offering it alongside foods they already like, without pressure, and give it time.
Conclusion
Homemade baby food without recipes comes down to one repeatable method: pick an ingredient, make it soft, blend it to the right texture, and store small portions. That single approach covers nearly everything your baby will eat in the first year. Learn the method, adjust texture as your baby grows, and keep an eye on the few foods that need special handling. If you want to streamline the process further, decide whether your current kitchen tools are enough before buying anything new—often, they are.

